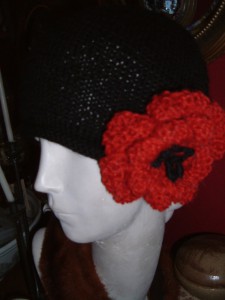
A head for knits – The Press, March 10th 2010
I’ve been playing round with hats lately.
A simple cloche or beanie can be knitted on two, four or five double pointed needles or on circular needles, whichever you feel happiest using. The shape is basically a tube tied off at one end, and if you have knitted a bag you can knit a hat.
When you know how, you can produce your own hat recipe for any sized head so choose a yarn you like and needles to match the ply.
Next, swatch your yarn. The number of stitches per 10cm will give you the basis to decide how many stitches you will need to cast on for your hat. If your swatch shows 20 stitches to 10cm then you have 2 stitches per cm. Measure the circumference of the head just above the eyebrows. If the head circumference is 55 cm then do the maths ( 55 x 2 = 110) and cast on 110 stitches.
Sometimes when doing the measurements things can get a bit tricky. Fear not. Tend towards less rather than more stitches at this juncture because if the hat is too large and you disappear inside it you may have to rip the finished product off the needles and start again, while if too small it will tend to stretch, especially if knitted in wool.
Here’s a basic recipe for a medium sized adult hat using approximately 150m of 8 ply woollen yarn.
The pattern below is a guide only, personalize it and make it your own.
On 3mm needles cast on 100 stitches, knit in stocking stitch for 10 rows or, if you want a more substantial rolled edge, cast on using 4mm needles and knit more rows for the edging. If using two needles, you will need to knit one row and purl the next to produce stocking stitch. If using a circular needle, just knit every row. When you knit stocking stitch you will produce a rolled edge and on thinner needles this will give a better grip on the head. If you prefer, you can begin with ribbing for an alternative edging.
When using a circular needle, choose a shorter length than the circumference required because a longer length will tend to produce a misshapen hat.
After the 10 rows, change to 4mm needles and continue for approximately 15 cm dependent on the size of the head. I have found that by measuring the length of the hand from wrist to the tips of the fingers of the person the hat is for you get a fair indication of the approximate number of cm you will require for the head height.
When you have reached the hat height you want, it’s time to decrease. You might decrease by 10% for a basic hat. If you want a flattened top be more aggressive in your decreasing, eg on odd rows *k2tog, repeat from * to the end of the row, and on even rows, purl. If you want a peak to your hat spread your decreases over twice the number of rows, decreasing every 4th row rather than every second row. This way you can shape your hat to your own liking.
To make life easier when decreasing, place a stitch marker after every tenth stitch then knit 2tog before each stitch marker. When you have 10 stitches remaining, thread the yarn tail through a darning needle and pass it carefully through each stitch, draw the thread up tightly and tie off then if you have knitted the hat on two needles, stitch the hat seam.
Below is a method to decrease when you have 100 stitches on two needles.
Row 1: *k8, k2tog, repeat from * to end of the row
Row 2 and each even numbered row: Purl
Row 3: *k7, k2tog, repeat from * to end of the row
Row 5: *k6, k2tog, repeat from * to end of the row
Row 7: *k5, k2tog, repeat from * to end of the row
Row 9: *k4, k2tog, repeat from * to end of the row
Row 11: *k3, k2tog, repeat from * to end of the row
Row 13: *k2, k2tog, repeat from * to end of the row
Row 15: *k1, k2tog, repeat from * to end of the row
Purl one last row and thread the tail of the yarn through all stitches, being careful not to miss any and tie off, then use this long tail to stitch the hat seam.
Voila, you have produced a hat. Now, why not design one with cables or some other stitch pattern, even Fair Isle, the basics are still the same. Play a little until you get the effect you desire.
If you want the crochet look but cannot crochet try the stitch pattern below.
Cast on multiples of 2 +1
Rows 1,2,3: Purl
Row 4: K1, * yon, slip 1, knit 1, psso, repeat from * to end of row
Rows 5,6,7: Purl
Row 8: K1, *yon, K2tog, repeat from * to end of row